You've made it through nine articles covering every component of a home golf simulator. Now let's put it all together with concrete examples.
These aren't hypothetical builds—they're realistic configurations that many golfers actually use. I'll show you exactly what to buy at three budget levels, what trade-offs you're making, and what the total investment looks like.
Use these as starting points. Adjust based on your space, priorities, and local availability.
Build 1: The Smart Starter ($3,500-$5,500)
Who this is for: First-time simulator owners, budget-conscious golfers, those testing the waters before committing more.
What you get: A fully functional simulator that lets you practice year-round, see meaningful shot data, and play virtual courses. Some accuracy and visual compromises compared to premium builds.
The Components
Launch Monitor: Garmin R10 — $600
The entry point that changed the simulator market. Radar-based, portable, surprisingly capable for the price.
What you get: Ball speed, launch angle, spin, carry distance. Club data is estimated (not measured). Works well with most simulator software.
Trade-off: Accuracy isn't tour-level, indoor spin readings can be inconsistent. But for practice and fun, it absolutely works.
Alternative: FlightScope Mevo ($500) or Rapsodo MLM2 Pro ($700)
Hitting Mat: SwingTurf 5x5 — $400
Solid multi-layer construction with decent joint protection. Thick enough to absorb shock without premium price.
What you get: A mat you can hit off daily without destroying your joints. Accepts real tees.
Trade-off: Not as forgiving as Fiberbuilt or TrueStrike, but dramatically better than cheap range mats.
Alternative: SigPro Softy ($300) or budget Fiberbuilt Flight Deck ($650, stretches budget)
Enclosure: Carl's Place DIY C-Series with Standard Screen — $700
The most popular DIY enclosure kit. Includes frame fittings, standard impact screen, enclosure fabric, and hardware.
What you get: A proper enclosure that contains balls, blocks light, and looks finished.
Trade-off: Standard screen has lower durability and image quality than Preferred/Premium. But it works.
What you provide: 1-inch EMT pipe from hardware store (~$150), basic tools
Alternative: Full DIY with separate screen ($500-600 total, more work)
Projector: Optoma GT1090HDR — $900
Short-throw 1080p projector with 4,200 lumens. Enough brightness for most spaces.
What you get: Crisp image from short distance. Fills common screen sizes from 8-10 feet.
Trade-off: Lamp-based (will need replacement eventually), not 4K.
Alternative: BenQ TH671ST ($750, lower lumens) or Optoma HD28HDR ($700, longer throw)
PC: Used/Refurbished Gaming Desktop — $700
Look for: Intel i5 (9th/10th gen) or Ryzen 5, GTX 1660 or RTX 2060, 16GB RAM, 256GB+ SSD.
What you get: Plenty of power for all simulator software at 1080p.
Trade-off: Used equipment carries some risk. Check thoroughly before buying.
Alternative: New budget build ($900-1,100) or dedicated gaming mini-PC
Software: GSPro — $250
One-time purchase, 30,000+ courses, active community.
What you get: Essentially infinite course variety, good graphics, solid gameplay.
Trade-off: Less polished than E6 Connect, some courses are better than others.
Alternative: Awesome Golf (free to start, see if it meets your needs)
Flooring: Basic Setup — $300
- Interlocking foam tiles for base (~$100)
- Basic turf for stance area (~$100)
- Budget putting turf near screen (~$100)
What you get: Comfortable standing surface, basic putting capability.
Trade-off: Putting won't be perfectly true, aesthetics are "functional."
Budget Build Total
| Component | Cost |
|---|---|
| Launch Monitor (Garmin R10) | $600 |
| Hitting Mat (SwingTurf) | $400 |
| Enclosure (Carl's DIY Standard) | $700 |
| EMT Pipe | $150 |
| Projector (Optoma GT1090HDR) | $900 |
| PC (Used Gaming Desktop) | $700 |
| Software (GSPro) | $250 |
| Flooring | $300 |
| Misc (cables, foam padding, etc.) | $150 |
| TOTAL | $4,150 |
Range: $3,500-$5,500 depending on component choices and deals found.
What This Build Is Like to Use
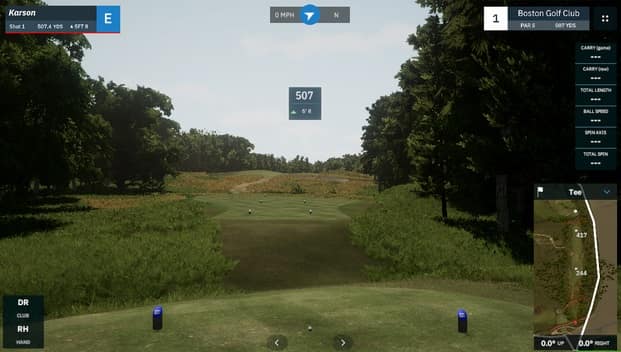
You walk into your garage, flip on the projector, and within a few minutes you're playing Pebble Beach. The image is clear at 1080p. Your shots track reasonably well—occasionally the spin reads a bit off, but distances are in the ballpark.
The mat is comfortable enough for 30-60 minute sessions. Your joints feel fine. The enclosure catches your shanks and looks clean.
Is it tour-level accuracy? No. Is it better than hitting into a net with no feedback? Dramatically yes. You'll improve your game, stay sharp in winter, and have fun doing it.
Perfect for: Golfers who want to test the simulator lifestyle before major investment, those who need to sell a spouse on the concept, anyone with limited budget but strong desire to practice.
Build 2: The Sweet Spot ($10,000-$15,000)
Who this is for: Serious golfers who want accuracy they can trust, visuals they'll enjoy, and equipment that lasts. The "buy once, cry once" approach for most components.
What you get: Tour-level launch monitor accuracy, excellent visual experience, quality components throughout. This is what most serious simulator owners build.
The Components
Launch Monitor: Foresight GC3 — $5,500
Camera-based, measures (not estimates) ball and club data. Used by professionals and tour players.
What you get: Ball speed, launch, spin, and spin axis measured with extreme accuracy. Club data with optional add-on ($1,000). You can trust every number.
Trade-off: Price. But you're getting data that genuinely helps you improve.
Alternative: Bushnell Launch Pro ($3,000, requires subscription for club data) or Mevo+ ($2,200, radar-based, slightly less accurate)
Hitting Mat: Fiberbuilt Player Preferred Series — $1,200
Premium bristle construction with Pure Impact Turf. Launch-monitor-tested for accurate ball data.
What you get: Hit thousands of balls with zero joint issues. Realistic turf interaction. Built to last years.
Trade-off: Some golfers don't love the bristle feel. But your body will thank you.
Alternative: TrueStrike (~$1,000 for hitting strip + stance mat combination)
Enclosure: Carl's Place DIY C-Series with Premium Screen — $1,400
Same quality kit, but with the triple-layer Premium screen that lasts longer and displays better images.
What you get: Professional-grade screen (tested to 250 mph), excellent image quality, reduced bounceback.
Why it matters: The screen is what you look at every single swing. Premium is worth it.
What you provide: EMT pipe (~$150) or add Carl's Pipe Framing Kit ($250)
Projector: BenQ TK710STi — $1,800
4K resolution, short throw, 3,200 lumens, laser-level color accuracy.
What you get: Sharp, vibrant visuals even on larger screens. Short throw ratio fits most spaces.
Trade-off: Lamp-based (laser would be another $1,000+), but excellent quality.
Alternative: BenQ TK700STi ($1,500, similar but previous generation)
PC: New Mid-Range Gaming Desktop — $1,300
Target specs: Intel i5-12400 or Ryzen 5 5600, RTX 3060 12GB, 32GB RAM, 512GB SSD.
What you get: Runs any simulator software at high settings, 4K capable, room to grow.
Trade-off: Could spend less on used, but new gives peace of mind and warranty.
Alternative: Pre-built gaming PC (CyberPowerPC, iBuyPower, etc.) often has good deals
Software: TGC 2019 — $900 + GSPro — $250
Yes, both. TGC for stunning graphics and popular courses. GSPro for endless variety.
What you get: Best of both worlds. Use TGC for playing and impressing friends, GSPro for practicing on specific courses or layouts.
Alternative: E6 Connect ($300/year subscription) instead of TGC if you prefer that ecosystem
Flooring: Quality Setup — $800
- Foam underlayment (~$200)
- Golf-specific stance turf (~$300)
- Quality putting turf (~$300)
What you get: Comfortable all-day practice surface, legitimate putting practice.
Sweet Spot Build Total
| Component | Cost |
|---|---|
| Launch Monitor (Foresight GC3) | $5,500 |
| Hitting Mat (Fiberbuilt Player Preferred) | $1,200 |
| Enclosure (Carl's DIY Premium) | $1,400 |
| EMT Pipe & Hardware | $200 |
| Projector (BenQ TK710STi) | $1,800 |
| PC (New Gaming Desktop) | $1,300 |
| Software (TGC 2019 + GSPro) | $1,150 |
| Flooring | $800 |
| Misc (cables, padding, audio, etc.) | $300 |
| TOTAL | $13,650 |
Range: $10,000-$15,000 depending on launch monitor choice and upgrades.
What This Build Is Like to Use
This is the real deal.
You step up to a Fiberbuilt mat that feels like real turf. You take a swing, and within a second, you see accurate data: 165.2 mph ball speed, 10.3 degree launch, 2,347 rpm spin. The ball flies across a stunning 4K rendering of Augusta National and lands exactly where the numbers predicted.
You hit 100 balls and your joints feel fine. The image is sharp and bright. Every shot teaches you something because the data is trustworthy.
When friends come over, they're impressed. This doesn't look like a hobby setup—it looks like what you'd see at a golf academy or performance center.
Perfect for: Serious golfers committed to improvement, those who entertain guests, anyone who knows they'll use the simulator heavily for years.
Build 3: The Dream Setup ($25,000-$35,000)
Who this is for: Golfers for whom budget isn't the constraint, commercial or semi-commercial installations, those who want absolute best-in-class everything.
What you get: Tour-level everything. The same technology professionals use. No compromises.
The Components
Launch Monitor: Foresight GCQuad — $14,000
The gold standard. Four high-speed cameras capture every detail of ball and club data with laboratory precision.
What you get: The most accurate consumer launch monitor available. Used on PGA Tour. Measures metrics no other device can.
Why this tier: If you're spending $30K on a simulator, you want data you can build a tour career on. GCQuad delivers.
Alternative: Uneekor EYE XO2 ($10,000) or Trackman 4 ($20,000+)
Hitting Mat: TrueStrike Pro with Combination Mat — $1,800
Gel-filled hitting strip with integrated stance mat. The most realistic impact feel available.
What you get: Fat shots feel like fat shots. Clean strikes feel clean. Your body stays healthy.
Alternative: Fiberbuilt with full combo system ($1,500+)
Enclosure: Carl's Place Pro Series — $3,500
Commercial-grade enclosure with 2-inch EMT, premium screen, professional fabric.
What you get: Walk-in-quality enclosure that looks like it belongs in a golf academy. Can accommodate larger bays (up to 20' wide).
Alternative: Custom-built enclosure by local contractor with Carl's Premium screen
Projector: BenQ LK936ST — $3,500
Laser, 5,100 lumens, 4K UHD, short throw. Professional-grade optics.
What you get: Bright enough for any lighting condition. Laser means 20,000+ hour life with no lamp changes. Zero warmup time.
Alternative: Optoma ZK608TST ($4,000) for even shorter throw if needed
PC: High-End Gaming Desktop — $2,500
Target specs: Intel i7-13700K or Ryzen 7 7800X3D, RTX 4070 Ti, 32GB DDR5 RAM, 1TB NVMe SSD.
What you get: Maximum graphics settings in any software, 4K at high refresh rates, future-proofed for years.
Why not more: Diminishing returns. A $5,000 PC doesn't run simulator software meaningfully better than $2,500.
Software: Full Suite — $1,500/year
- E6 Connect ($300/year): Polished multiplayer experience
- TGC 2024 ($1,200 one-time): Best graphics and course design
- Plus GSPro for variety
What you get: Access to every popular platform, any course you want to play.
Flooring: Premium Custom Installation — $3,000
- Professional-grade foam base
- Premium putting green with multiple cup positions
- Custom contour option (slight break)
- Full coverage of simulator room
- Professional installation
What you get: A floor that looks and plays like a high-end golf facility.
Additional Premium Items — $2,000
- High-quality soundbar/speaker system ($500)
- Second monitor for data/settings ($300)
- Premium foam protection throughout ($300)
- Custom lighting ($400)
- Golf accessories (club storage, ball trays, etc.) ($500)
Dream Build Total
| Component | Cost |
|---|---|
| Launch Monitor (Foresight GCQuad) | $14,000 |
| Hitting Mat (TrueStrike Pro Combo) | $1,800 |
| Enclosure (Carl's Pro Series) | $3,500 |
| Projector (BenQ LK936ST) | $3,500 |
| PC (High-End Desktop) | $2,500 |
| Software (E6 + TGC + GSPro) | $1,700 |
| Flooring (Premium Custom) | $3,000 |
| Additional Items | $2,000 |
| Installation/Misc | $1,000 |
| TOTAL | $33,000 |
Range: $25,000-$35,000+ depending on options and custom work.
What This Build Is Like to Use
You walk into a room that could be mistaken for a professional golf facility.
The putting green has visible break. The screen goes floor-to-ceiling with no visible frame. The projector creates an image so bright and sharp it's almost disorienting at first.
You take a swing and see data that matches what tour players analyze: exact face angle, 3D club path, precise spin axis. The numbers are accurate to fractions of degrees.
The software is stunning—4K rendering of Augusta at a level of detail that makes you forget you're indoors. The audio creates genuine immersion.
This isn't a simulator in your garage. This is a golf performance center that happens to be in your home.
Perfect for: Those who can afford the best and won't be satisfied with less, aspiring competitive golfers, teaching professionals who work from home, high-end real estate installations.
Upgrade Path Strategy
Not everyone can (or should) start with their dream build. Here's how to upgrade intelligently over time:
Phase 1: Foundation ($3,500-$5,000)
Start with the Budget Build. Get something functional and start using it.
Priority investments:
- Decent launch monitor (you can't upgrade around bad data)
- Safe enclosure (don't risk injury or property damage)
- Mat that won't hurt you
Where to save:
- Entry-level projector (easy to upgrade later)
- Used PC (accomplishes the same task)
- Basic flooring (can improve incrementally)
Phase 2: Visual Upgrade ($1,500-$3,000)
After 6-12 months, if you're using the simulator regularly, upgrade the visual experience:
- Better projector (BenQ TK710STi or similar)
- Premium screen (swap Standard for Premium)
- Improved flooring
This transforms the feel without touching the data capture.
Phase 3: Accuracy Upgrade ($3,000-$6,000)
When you're ready for serious improvement work, upgrade the launch monitor:
- Move from Garmin R10 to GC3 or Mevo+
- Sell your entry-level monitor (they hold value well)
Now you have data you can genuinely rely on for swing changes.
Phase 4: Premium Experience ($2,000-$5,000)
Polish the experience:
- Premium mat (TrueStrike or Fiberbuilt upgrade)
- Custom flooring with putting green
- Audio system
- Secondary display for data
Total Over Time vs. All At Once
Building in phases often costs 10-20% more than buying everything upfront (you replace some items). But it:
- Spreads cost over time
- Lets you learn what you actually value
- Reduces risk of buyer's remorse
- Gets you practicing sooner
If you can afford the mid-tier build now, that's the sweet spot. If not, the phase approach is entirely valid.
Final Thoughts
Building a home golf simulator is a significant investment—in money, space, and time. But for golfers who commit to it, the payoff is enormous:
- Practice whenever you want, regardless of weather
- Get real data on every swing
- Play famous courses you might never visit
- Share the experience with friends and family
- Actually improve, not just hit balls
The "right" build depends entirely on your budget, goals, and dedication. A $4,000 setup used five days a week delivers more value than a $30,000 setup that collects dust.
Start where you can. Upgrade when it makes sense. Most importantly, use what you build.
I'll see you on the virtual fairways.
Series Wrap-Up
This completes The Perfect Lie's Complete Beginner's Guide to Home Golf Simulators. Here's what we covered:
- Is a Home Golf Simulator Right for You? — Honest assessment
- Space Planning 101 — Measuring and evaluating your space
- Understanding Launch Monitors — The technology that makes it work
- Hitting Mats — Protecting your body
- Impact Screens — Durability and image quality
- Projector Selection — Creating the visual experience
- Building Your Enclosure — Kits vs. DIY
- Flooring — Comfort and putting surfaces
- The PC & Software — The electronic brain
- Putting It All Together — Complete builds at every budget
Have questions? Want to share your own build? Drop a comment below or reach out directly.
Happy building.
— The Perfect Lie Team
Sign in to leave a comment
No comments yet. Be the first to comment!